Yet Another Alcohol Stove
Alcohol stoves are inexpensive, lightweight alternatives to commercial backpacking stoves. They are used primarily for boiling water to rehydrate dehydrated meals. If your camp cooking is more complicated than that, or if you need to cook for more than 1 person, this stove may not be for you.
In my quest for the perfect alcohol stove, I have experimented with several designs. After learning how these stoves function, I designed my own. I call it the Yaas stove, since it is Yet Another Alcohol Stove. My own hardly-scientific tests show that it boils water faster than any other alcohol stove I have tried.
The Yaas stove works on the same principle as the Cat stove and the Pika Stove. And is a variation of the Sqrl Stove. It weights about 1/2 as much as the Cat stove.
Brian Robinson, whose father designed the Cat stove, explains why chimney style alcohol stoves, such as the Cat stove and Yaas stove, work better than pressurized alcohol stoves.
The vent holes in my Cat stove are too large, causing the Cat stove to leak fuel if a full ounce of fuel is poured into it. The Yaas stove burns as hot as a Cat stove, but will hold 2 ounces of fuel. With 1 ounce of fuel I was able to bring 2 cups of water to a rolling boil in about 4 minutes 20 seconds. There are many factors that affect boiling times and fuel requirements. You should conduct your own tests before using this stove in the back country.
After this page was posted, I was contacted by Deems Burton, the designer of the Pika stove. After some discussion we agreed that while the Yaas stove may burn hotter than his Pika stove, and bring water to a boil faster, the Pika stove uses less fuel. If you are looking for a fuel efficient alcohol stove, and are willing to wait a minute or two longer for water to boil, the Pika stove would be a better stove for you.
[Update] I have recently tried changing the size of the top vent hole on the Yaas stove. I have been able to reduce the amount of fuel needed to bring water to a boil, though I have not reached the efficiency of the Pike stove. The new template has a pattern for cutting a smaller top vent hole. My hardly scientific tests show that with a 1 1/2 inch or 1 1/4 inch vent hole, the Yaas stove will bring two cups of water to a rolling boil in about 5 1/2 minutes on one ounce of fuel, and will continue burning for one minute longer. This means that the amount of fuel needed can be reduced, though 1/2 ounce of fuel was not enough to bring the water to a boil. With a 1 inch vent hole, the Yaas stove does not put out enough heat to bring water to a boil.
The Yaas stove is designed to burn denatured alcohol only. Attempting to burn other fuels, such as white gas, will result in a large orange flame that makes a sooty mess. White gas will not burn hot enough in this stove to boil water. OK, it might, but I'm not going to try it.
Because alcohol stoves cannot be shut off mechanically, you should use the same precautions with an alcohol stove that you would with any open flame in the backcountry. Alcohol stoves may not be allowed in areas that have restrictions on fires, and may not be safe in high winds.
Materials:
Three 12 oz aluminum pop cans.
The Yaas stove template.
Epoxy (optional).
Fiberglass insulation.
Tools:
Utility knife.Scissors.
Hole punch.
Also:
Various scraps of wood, or other items that will stack up to 7/8 inch tall and 1 7/16 tall respectively.
Step 1: Cut out the burner hole.
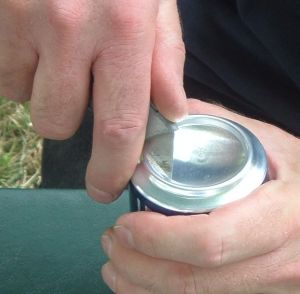
Stand one of the pop cans bottom side up. Use the knife to score the can around the inside of the ridge on the bottom of the can.
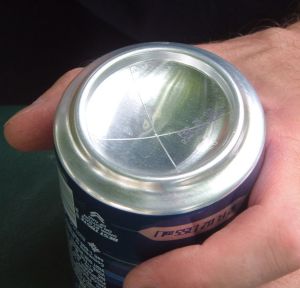
Score an X inside this circle.
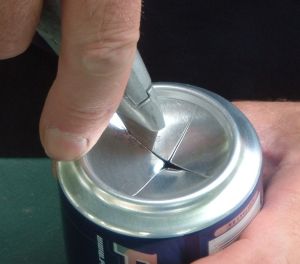
Cut along each score from the center of the can to the ridge.
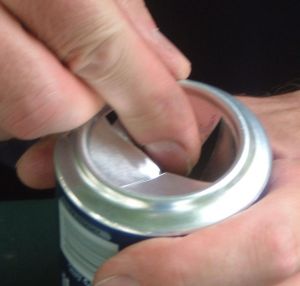
Break out the four pieces leaving a round hole.
Step 2: Cut down two of the cans.
Cut the pop can with the burner hole down to 7/8 inches tall from the bottom. Cut the other can 1 7/16 inch tall from the bottom of the can.
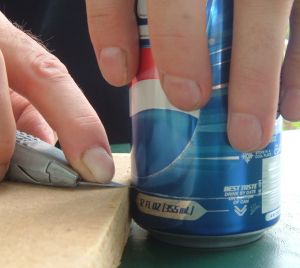
The best way to mark where to cut the cans is to find something that is the correct height, or several items that will stack up to the correct height. Place the flat side of the utility knife on top if these items with the point barely hanging over. Stand the can next to the knife point, and rotate the can while pushing it into the knife point. Cut the can along this mark with scissors. Or continue rotating the can until the knife point cuts through the can.
In this illustration I am using a scrap of 1 x 4 on top of a scrap of 1/8 inch masonite. To measure the base I use two pieces of 1 x 4 and set the can on top of a scrap of 1/16 inch sheet metal next to them. 3/4 + 3/4 - 1/16 = 23/16 = 1-7/16.
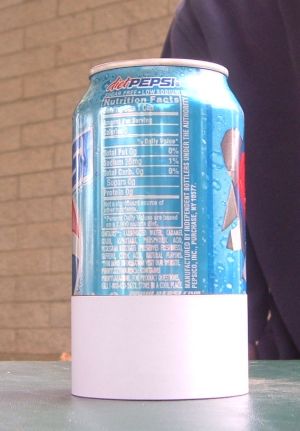
An alternative is use the strips on page 2 of the template. For each can cut out one of the strips. Wrap it around one of the pop cans and tape down the end. Stand the can up on a table top and slide the strip down until it rests on the table. Tape the top edge in place. Cut the can along the top edge of the strip. This method is less accurate, so it should only be used if you cannot accurately measure the heights of the cans in another way.
Step 3: Stretch the base can.
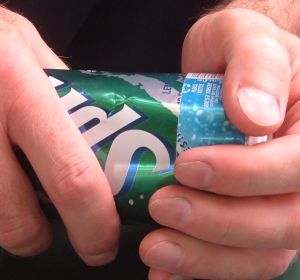
The can with the burner hole must fit inside of the taller can without ripping it. Take the third can, which has not been cut down, and work the bottom of it into the opening of the base can. Push it in. Pull it out. Rotate it. Twist it. Stretch out the first 1/2 inch of the opening of the base can just enough to allow the top can to fit inside of it. Don't try to stretch the base all at once. If you work too fast, you will ruin the base.
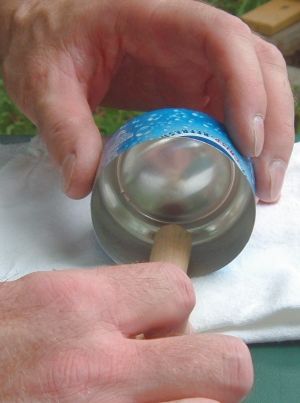
The base can can also be stretched be placing it on its side on top of material that has some give. Place the end of a dowel inside the can. Slide the dowel around the perimeter of the while pushing down, causing the can to roll.
Step 4: Punch holes.
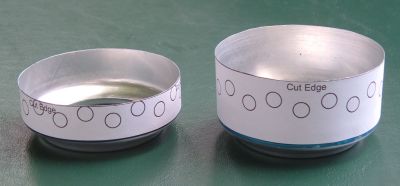
Cut out each of the strips on page 1 of the template. Wrap the wider strip around the base can with the indicated edge of the strip along the cut edge of the can. Wrap the narrower strip around the top can with the indicated edge of the strip along the cut edge of the can.
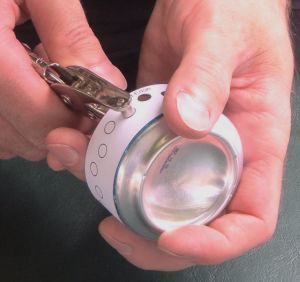
Punch holes as indicated by the marks on each strip. Remove each strip.
Step 5: Cut teeth in the top can.
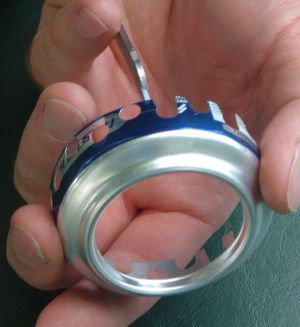
The bottom of each hole in the top can should be cut out with scissors. This will result in a row of "teeth" along the cut edge of the can.
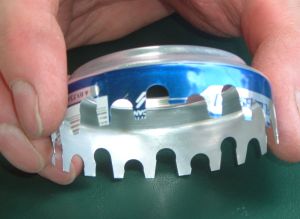
Cut one of the "teeth" shorter than the others. This will make it easier to fit the two pieces together.
Step 6: Pre-fit the pieces.
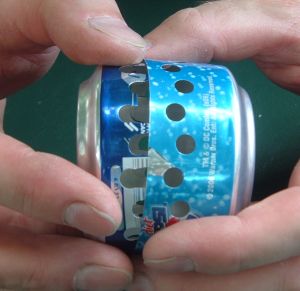
Working from the side opposite the shortest "tooth," slide the top piece inside of the base piece. Be careful not to split the base can. Make sure the pieces fit and the holes line up.
Step 7: Epoxy the pieces together.
The stove will function just fine without the pieces being epoxied together. Epoxying the stove together will add to its strength.
Pull the two pieces apart, then apply a thin coat of epoxy to each of the "teeth" on the top can. Working from the side opposite the shortest "tooth," slide the top piece back into the base, making sure that the holes line up.
Step 8: Fill with fiberglass insulation.
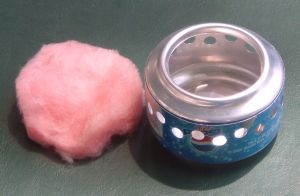
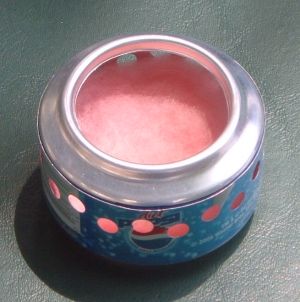
Cut a piece if fiberglass insulation large enough to fill the bottom of the stove up to the bottom of the holes. Insert the fiberglass insulation inside of the stove. Be careful not to block any of the holes.
You may need to trim some of the fiberglass from the bottom center of the piece of insulation to allow it to fit over the bump in the bottom of the stove. If there are thin spots in the insulation, they can be filled in with scraps. All of the pieces will hold together after the stove has been used the first time.
The stove is complete.
The stove should be used with a pot stand and wind screen. To operate the stove, fill it with 1 ounce of denatured alcohol. Light the alcohol. Place the pot stand over the stove. Place the wind screen around the stove. Place the pot on the pot stand. The amount of alcohol needed will vary depending on the amount of water being boiled and environmental conditions such as ambient temperature, water temperature, wind, etc.
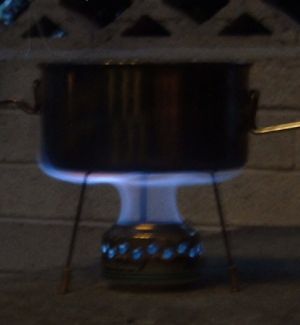
Instructions for building a wind screen can be found on the internet. I like the windscreen design provided by Sgt. Rock. I make two modifications. I staple the joints, and I punch holes every 1/2 inch.
Instructions for building a pot stand can be found here.
Yet Another Pot Stand
The stand can be built taller or shorter, but should be built to fit inside of your pot when folded. These instructions will make a stand 3-1/4 inches tall and small enough to fit inside of a pot with a 5-1/2 inch diameter.
The stand is built with coat hanger wire. Variations in the diameter of coat hanger wire will affect how well this pot stand design works.
Materials:
Wire coat hanger.
3/16 inch aluminum tubing, available at hobby shops.
(The exact diameter of the tubing will depend on the gauge of the coat hanger wire.
Use the largest diameter tube that two pieces of hanger wire cannot fit into without
flattening the tube.)
Three spent .22 caliber shells.
Epoxy.
Tools:
Pliers.
Wire cutters.
Tube cutter.
Pen.
Ruler.
Scratch paper.
Hammer or vice.
Step 1: Prepare the hanger.
Cut the hook off of the hanger and straighten the hanger wire.
Step 2: Bending to shape.
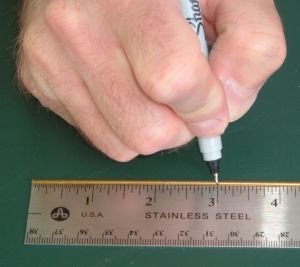
Make a mark 3 inches from one end of the hanger wire.
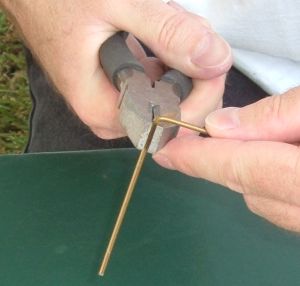
Using pliers, bend the wire at the mark to about 90 degrees.
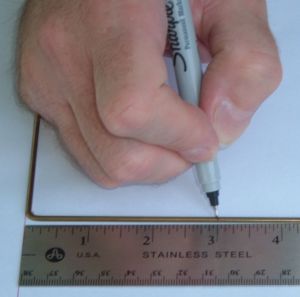
Make a mark 3 inches from the outside of the bend.
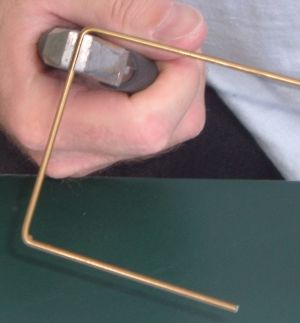
Use pliers to bend the wire at this mark to about 90 degrees.
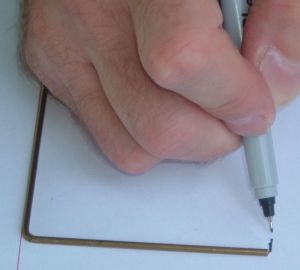
Measure from the end of the wire to the outside of the first bend.
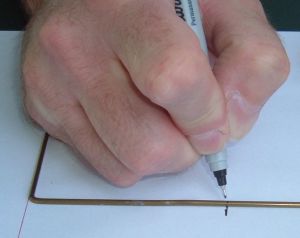
Use this measure to mark where to cut the wire so that both legs will be the same length.
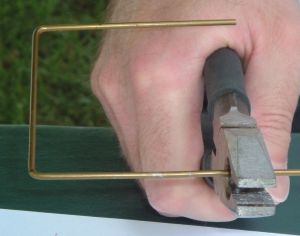
Cut the wire at this point.
Bend and cut a second piece of wire to match the first piece.
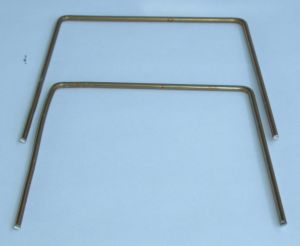
Reshape both wire pieces so that each angle is slightly more than 90 degrees.
Step 3: Putting it together.
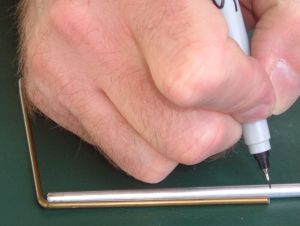
Measure from one end of the wire to the inside of the first bend. Cut a piece of aluminum tubing to this length.
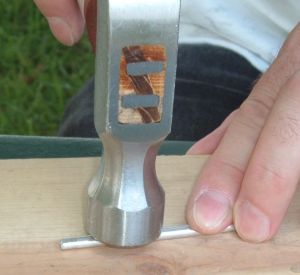
The tubing will need to be flattened slightly into an oval shape. You can flatten it in a vice, or tap it lightly with a hammer down the length of the tube on both sides of the tube.
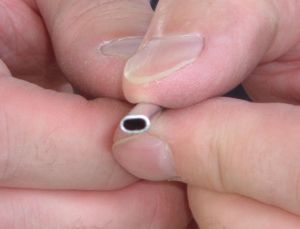
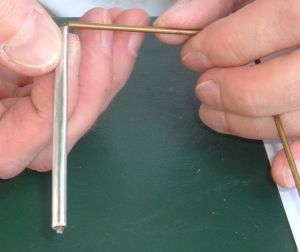
Insert one end of one piece of wire into the tube until the end of the tube reaches the first bend in the wire.
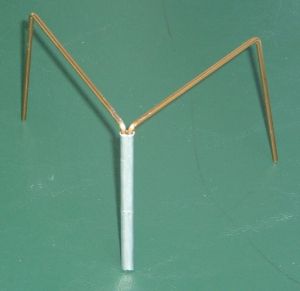
Do the same with the second piece of wire, inserting the end of the wire into the same end of the tube. This should be a very snug fit. It will take some effort to get both wires into the tube. Push them all the way in, but not far enough to cause the end of the tube to flair. The ends of the wires should both be flush with the end of the tube. The tube should hold both wires tightly while allowing them to pivot. The tube will act as a hinge allowing the stand to be folded and unfolded.
Step 4: Apply feet.
This step is optional. If you have used a heavier coat hanger wire, you will have to use a tube larger than 3/16 inch, and a .22 caliber shell foot will not fit over the tube.
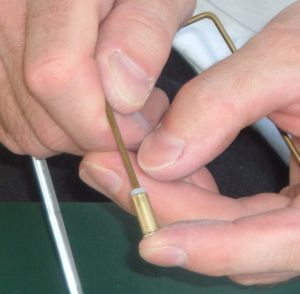
Each wire now has one end in the aluminum tube and one end free. Fill one of the spent .22 caliber shells with epoxy and push the free end of one of the wires into the shell. Remove any excess epoxy. Let the epoxy set.
Do the same for the other free leg.
Using pliers, slightly flatten the remaining .22 caliber shell so that it will slip over the flattened aluminum tube. Fill this shell about 1/2 full of epoxy, and push the end of the aluminum tube into it. Remove any excess epoxy. As the epoxy sets, fold and unfold the stand a few times to prevent the epoxy from causing the wires to seize inside of the aluminum tube.
The pot stand is complete.
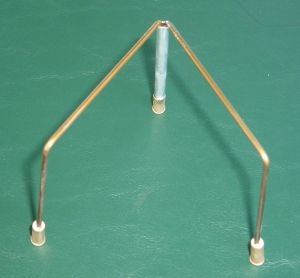
To use the stand, simply unfold it so that the top forms two sides of an equilateral triangle.
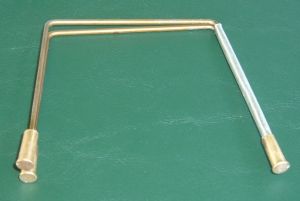
To pack the stand, fold the legs together and place it in the bottom of your pot.
[update] After using this pot stand in the field, I have concluded that 1) the feet serve no real purpose, and 2) the stand is not as stable as I would have liked. I would like to find another design that is as simple and still fits inside my pot when folded down.